 Save to Pinterest
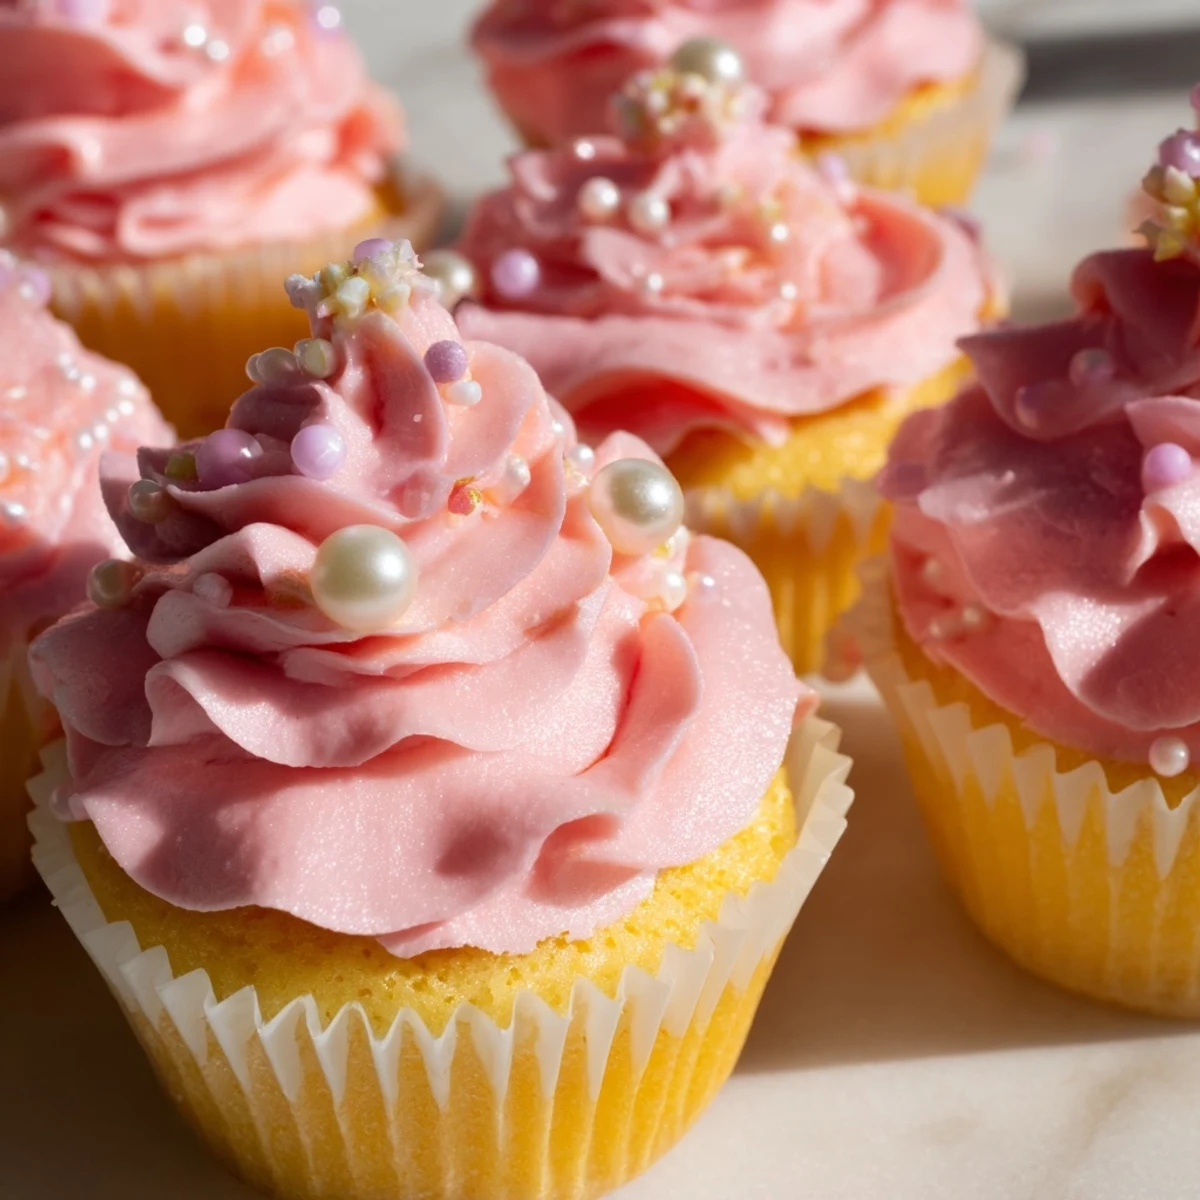
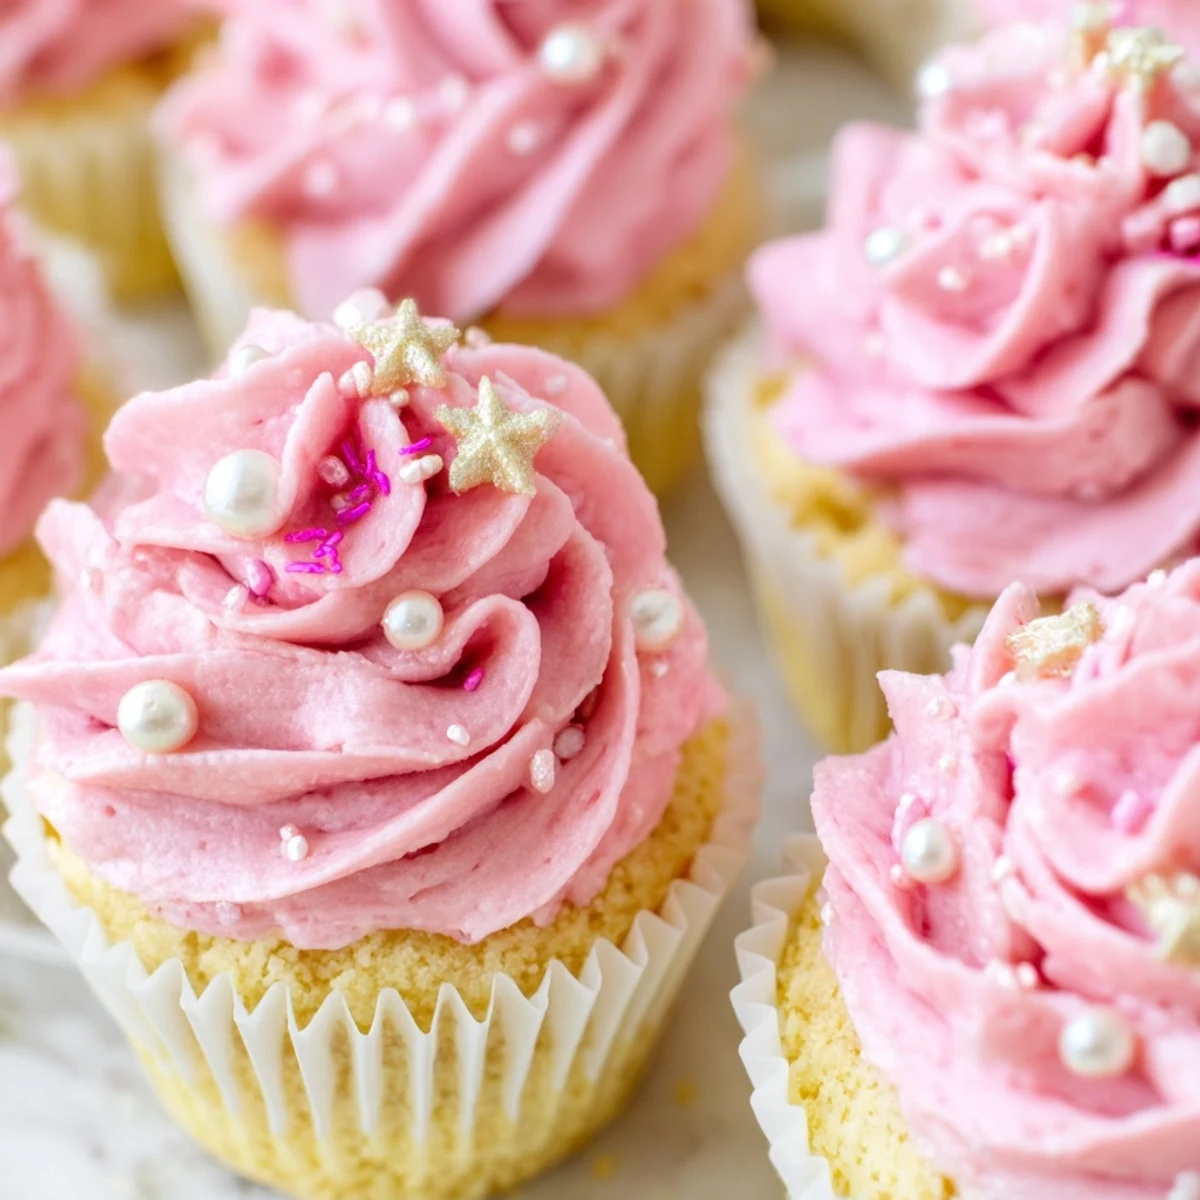
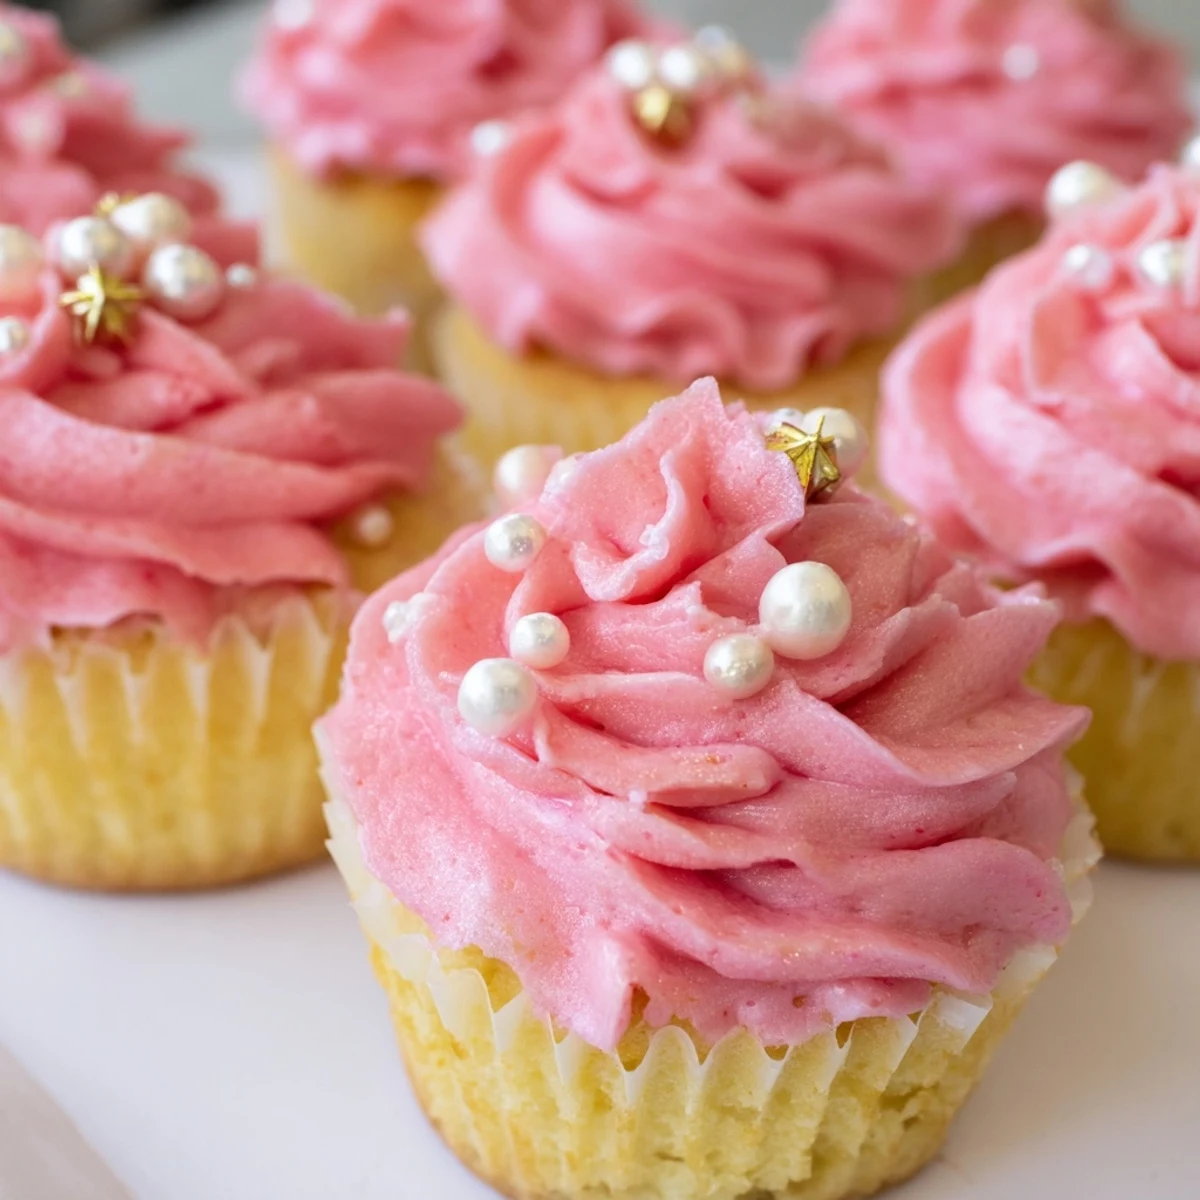
 Create the perfect sweet treat for welcoming a baby girl with these adorable vanilla cupcakes topped with dreamy pink buttercream. The tender, moist crumb pairs beautifully with silky smooth frosting that pipes into gorgeous rosettes or swipes effortlessly for a rustic finish.
These handheld delights come together in just 45 minutes from start to finish. The vanilla bean-speckled batter bakes into golden-domed beauties, while the buttercream frosting transforms into any shade of pink you desire—from soft blush to vibrant rose.
Decorate with edible pearls, shimmering sprinkles, or adorable baby-themed toppers to match your shower decor. Make them a day ahead and frost before the party begins for stress-free entertaining.
The morning of my niece's baby shower, I woke up at dawn unable to sleep. Something about celebrating a new baby girl made my heart feel too full to stay in bed. I ended up making three dozen of these pink cupcakes while the house was still quiet, watching the sun come up through the kitchen window as they baked. There's something about the smell of vanilla and warm butter that feels like hope itself.
My sister cried when she saw the spread of cupcakes on the dessert table, not because they were fancy, but because they looked like love in edible form. All the women at the shower kept asking which bakery I'd ordered them from, and when I told them I'd baked them that morning, they looked at me like I'd revealed a magic trick. There were exactly two left by the time we finished opening gifts, and someone gently wrapped them in a napkin for my sister to take home for later.
Ingredients
- 1 1/4 cups all-purpose flour: Sifted even though it feels like an extra step, this prevents any lumps and makes the crumb impossibly fine
- 1 teaspoon baking powder: Fresh baking powder makes all the difference in getting that nice rise, so check the expiration date if yours has been sitting in the pantry for ages
- 1/4 teaspoon baking soda: Works with the baking powder to give the cupcakes just enough lift without making them taste metallic or bitter
- 1/4 teaspoon salt: Don't skip this even though it seems strange in a sweet recipe because salt actually enhances the vanilla flavor
- 1/2 cup unsalted butter softened: Leave it out on the counter for at least an hour because room temperature butter blends into the sugar so much better than cold butter ever could
- 3/4 cup granulated sugar: Cream this with the butter longer than you think you should, because those air bubbles are what make the cupcakes tender
- 2 large eggs room temperature: Cold eggs can seize up the butter mixture, so give them a quick warm water bath if you forgot to take them out ahead of time
- 1 teaspoon pure vanilla extract: This is where you should splurge on the good stuff because artificial vanilla never quite captures that warm round flavor
- 1/2 cup whole milk: Whole milk creates a richer cupcake, though I've made these with 2% in a pinch and they were still wonderful
- 1 cup unsalted butter softened: For the frosting, this should be slightly cooler than room temperature but still easily impressionable when you press it with your finger
- 3 cups powdered sugar sifted: Sifting might seem tedious but those little lumps will never fully break down and you'll end up with speckled buttercream
- 2–3 tablespoons milk or heavy cream: Start with two tablespoons and add more only if the frosting feels too stiff to pipe smoothly
- 1 teaspoon pure vanilla extract: Same beautiful vanilla as the cupcakes, creating a harmony between the cake and frosting
- Pink food coloring gel preferred: Gel coloring is so much better than liquid because it won't thin out your perfectly whipped buttercream
Instructions
- Getting everything ready:
- Preheat your oven to 350°F and line a 12-cup muffin tin with pretty liners. I always do this first because there's nothing worse than having batter ready and realizing you forgot to prep the pan.
- Whisking the dry ingredients:
- In a medium bowl, combine the flour, baking powder, baking soda, and salt. Give it a good whisk to distribute everything evenly because clumps of baking powder create weird spots in the finished cupcakes.
- Creaming the butter and sugar:
- Beat the butter and sugar together for a full 2 to 3 minutes until it's pale and fluffy. You'll be surprised by how much lighter the mixture gets, and this airiness is literally what makes the cupcakes tender.
- Adding eggs and vanilla:
- Add the eggs one at a time, really beating well after each one. Then mix in the vanilla, scraping down the sides of the bowl to catch any butter that escaped the beaters.
- Combining everything:
- Add half the dry ingredients on low speed, then all the milk, then the remaining dry ingredients. Mix only until you don't see dry flour because overworking the gluten makes tough cupcakes.
- Filling the liners:
- Divide the batter evenly among the cupcake liners, filling each about 2/3 full. An ice cream scoop with a trigger works perfectly for this and keeps your hands clean.
- Baking to perfection:
- Bake for 18 to 20 minutes until a toothpick comes out clean. Cool them in the pan for 5 minutes before moving them to a wire rack because they're too fragile to move when they're hot.
- Making the buttercream:
- Beat the softened butter until creamy, then gradually add powdered sugar one cup at a time. Add vanilla and 2 tablespoons of milk, beating until it's fluffy and smooth.
- Adding the magic color:
- Add pink food coloring a tiny bit at a time, mixing completely after each addition. Gel food coloring is intense so start with less than you think you need.
- Decorating your creations:
- Frost the cooled cupcakes using a piping bag with a star tip or spread with a spatula if you prefer a rustic look. Add pearls or sprinkles while the frosting is still soft so they stick.
 Save to Pinterest
 After the baby shower, my sister saved one cupcake and put it in her freezer, something she read about doing to remember special moments. Six months later, when the baby was born during a blizzard, she thawed that cupcake and ate it in the hospital room, texting me a photo of the last bite. Some recipes are just food, but sometimes they become part of the story.
Making These Ahead
The cupcakes themselves can be baked a full day ahead and stored in an airtight container at room temperature. I've even frozen naked cupcakes for up to a month, wrapped well in plastic and then foil, and they thaw beautifully overnight on the counter. Just don't frost them until you're ready to serve because the buttercream will weep if it sits too long.
Getting That Perfect Pink
Gel food coloring can look scary dark when you first dip into it, but a tiny toothpick amount goes incredibly far. Start with what looks like nothing and build up the color gradually, mixing completely between each addition. The color will deepen slightly as the frosting sits, so stop a shade lighter than your target and let it rest for 15 minutes before deciding to add more.
Piping Like A Pro
Don't stress if your first few cupcakes look wonky because the last ones will be perfect as you get the hang of the pressure. Hold the piping bag perpendicular to the cupcake, about half an inch above the surface, and squeeze from the top of the bag rather than the middle. Swirl from the outside in, releasing pressure as you reach the center to pull that cute little peak up.
- If your hand gets tired piping all 12 cupcakes, take a break halfway through and shake out your fingers
- A rotating cake turntable makes piping so much easier, but a dinner plate you can spin works just fine
- Keep adding your sprinkles and decorations immediately after piping each cupcake because the frosting develops a skin that makes toppings slide right off
 Save to Pinterest
 Every time I make these now, I think about new beginnings and the way something as simple as a pink cupcake can make a moment feel special. Here's to baby girls and the joy they bring.
Recipe FAQs
- → Can I make these cupcakes ahead of time?
-
Absolutely! Bake the cupcakes up to 24 hours in advance. Store them in an airtight container at room temperature. Frost just before serving for the freshest presentation and texture.
- → What's the best way to achieve the perfect pink color?
-
Gel food coloring delivers the most vibrant shades with minimal liquid. Start with a toothpick-sized amount and gradually add more until you reach your desired hue. Remember, the color deepens slightly as the frosting sits.
- → Can I use salted butter instead of unsalted?
-
You can, but reduce the added salt in the cupcake batter by half. For the buttercream, salted butter works wonderfully and actually enhances the overall flavor profile of the sweet frosting.
- → How do I store leftover frosted cupcakes?
-
Keep frosted cupcakes in a cool, dry place away from direct sunlight. They'll stay fresh for 2-3 days. For longer storage, refrigerate in an airtight container, but bring to room temperature before serving for the best texture.
- → Can I make these into full-sized cakes?
-
Certainly! This batter yields two 8-inch round cakes or one 9x13 inch sheet cake. Adjust baking time to 30-35 minutes for rounds or 25-30 minutes for the sheet cake, testing for doneness with a toothpick.
- → What piping tip works best for baby shower cupcakes?
-
A large open star tip (like Wilton 1M) creates classic swirls that look stunning and are beginner-friendly. For ruffles, try a petal tip (Wilton 104), or use a round tip for simple, elegant dots that mimic pearls.
