 Save to Pinterest
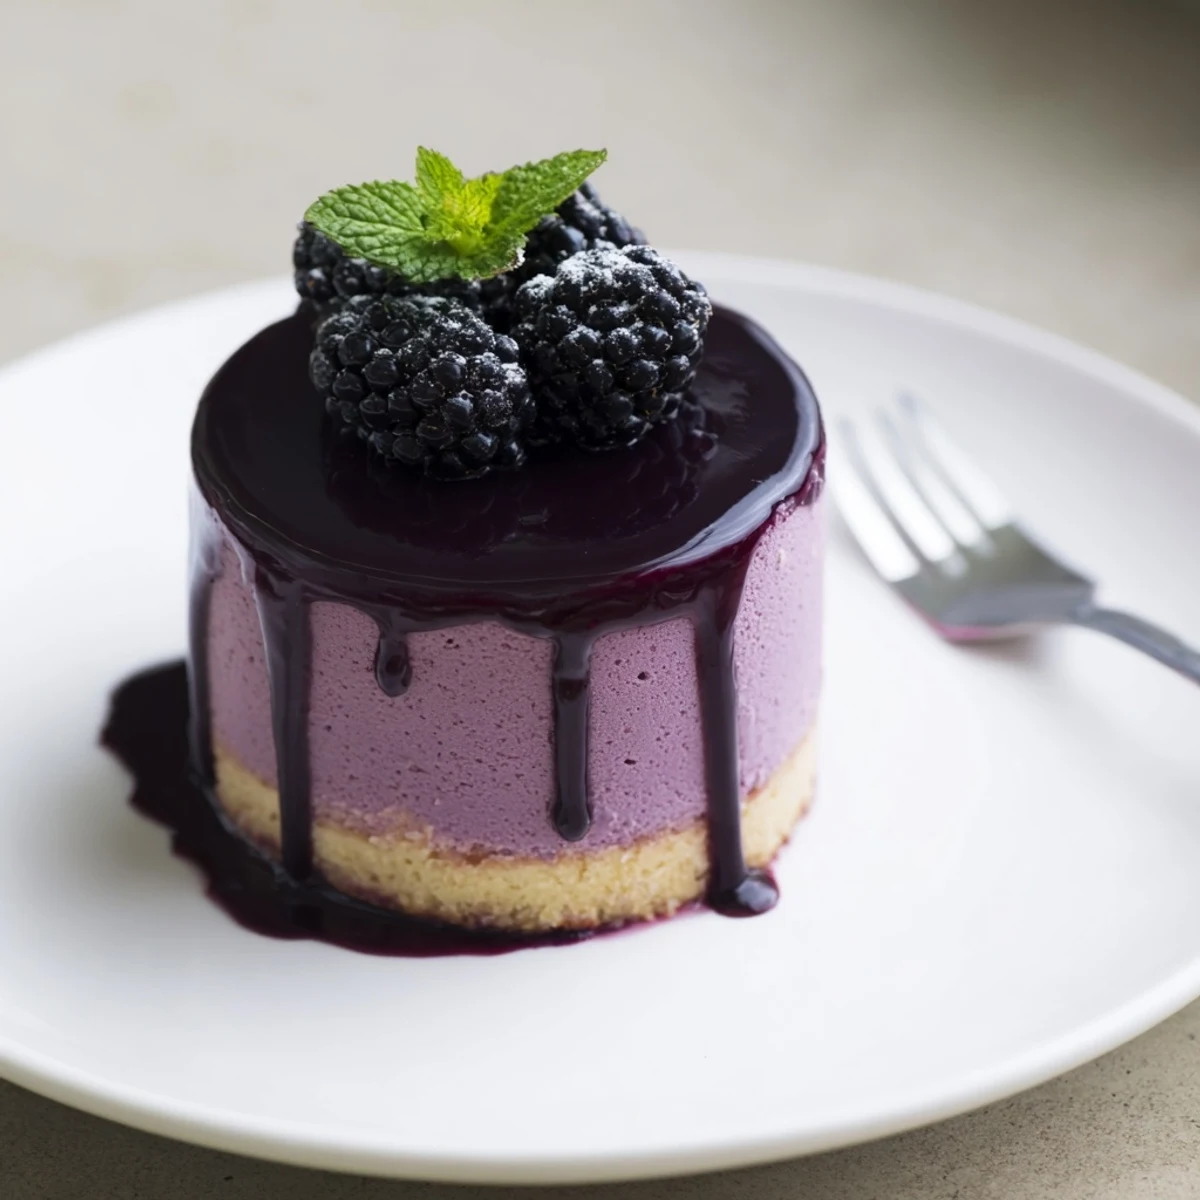
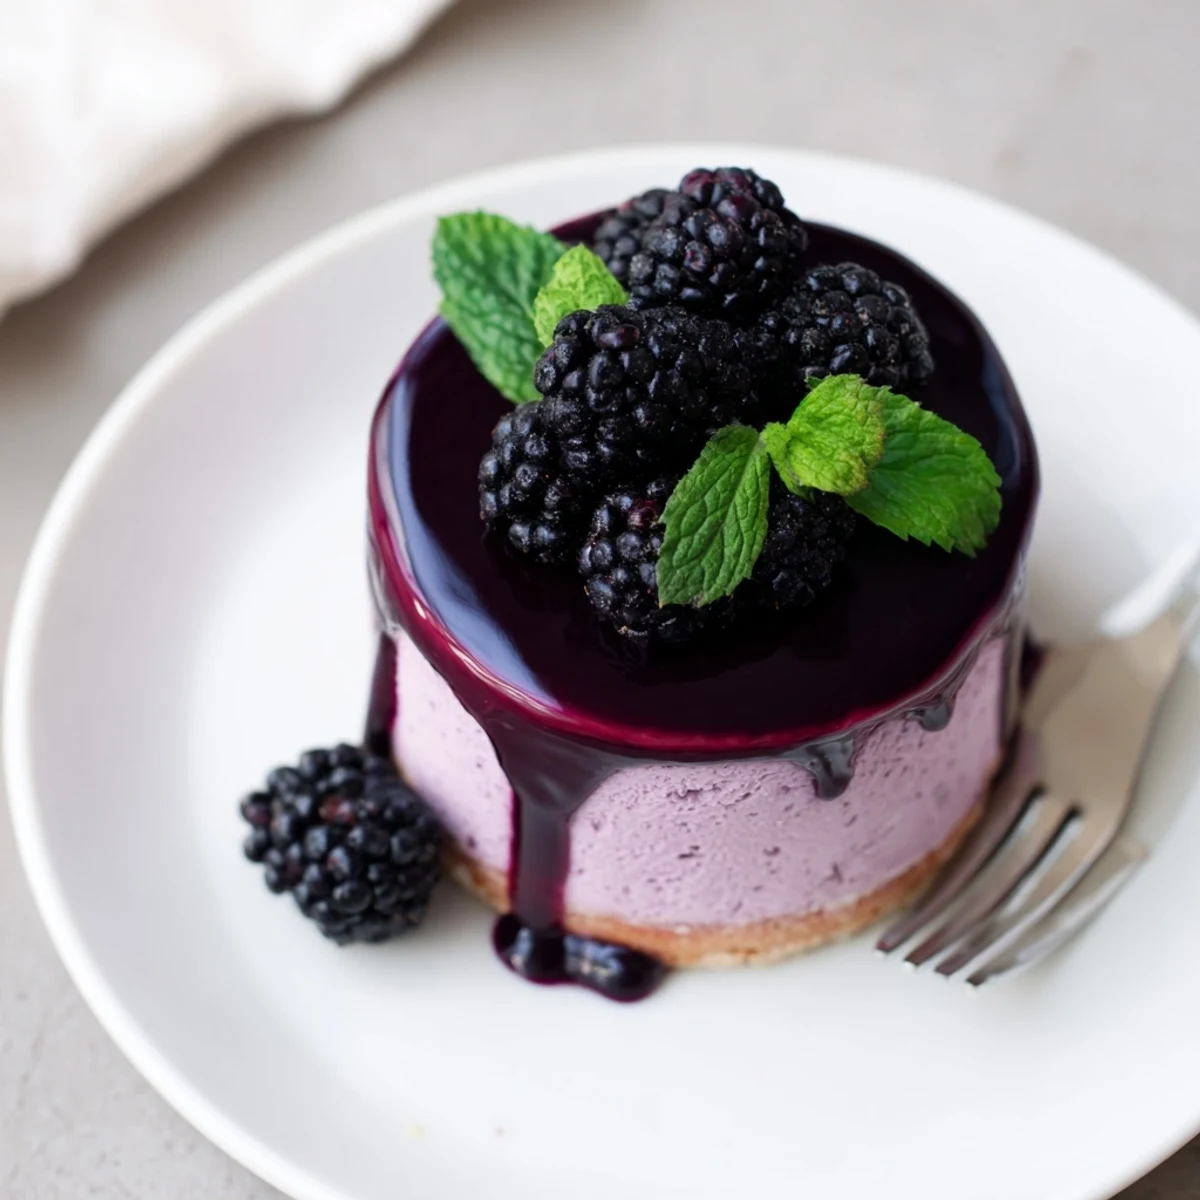
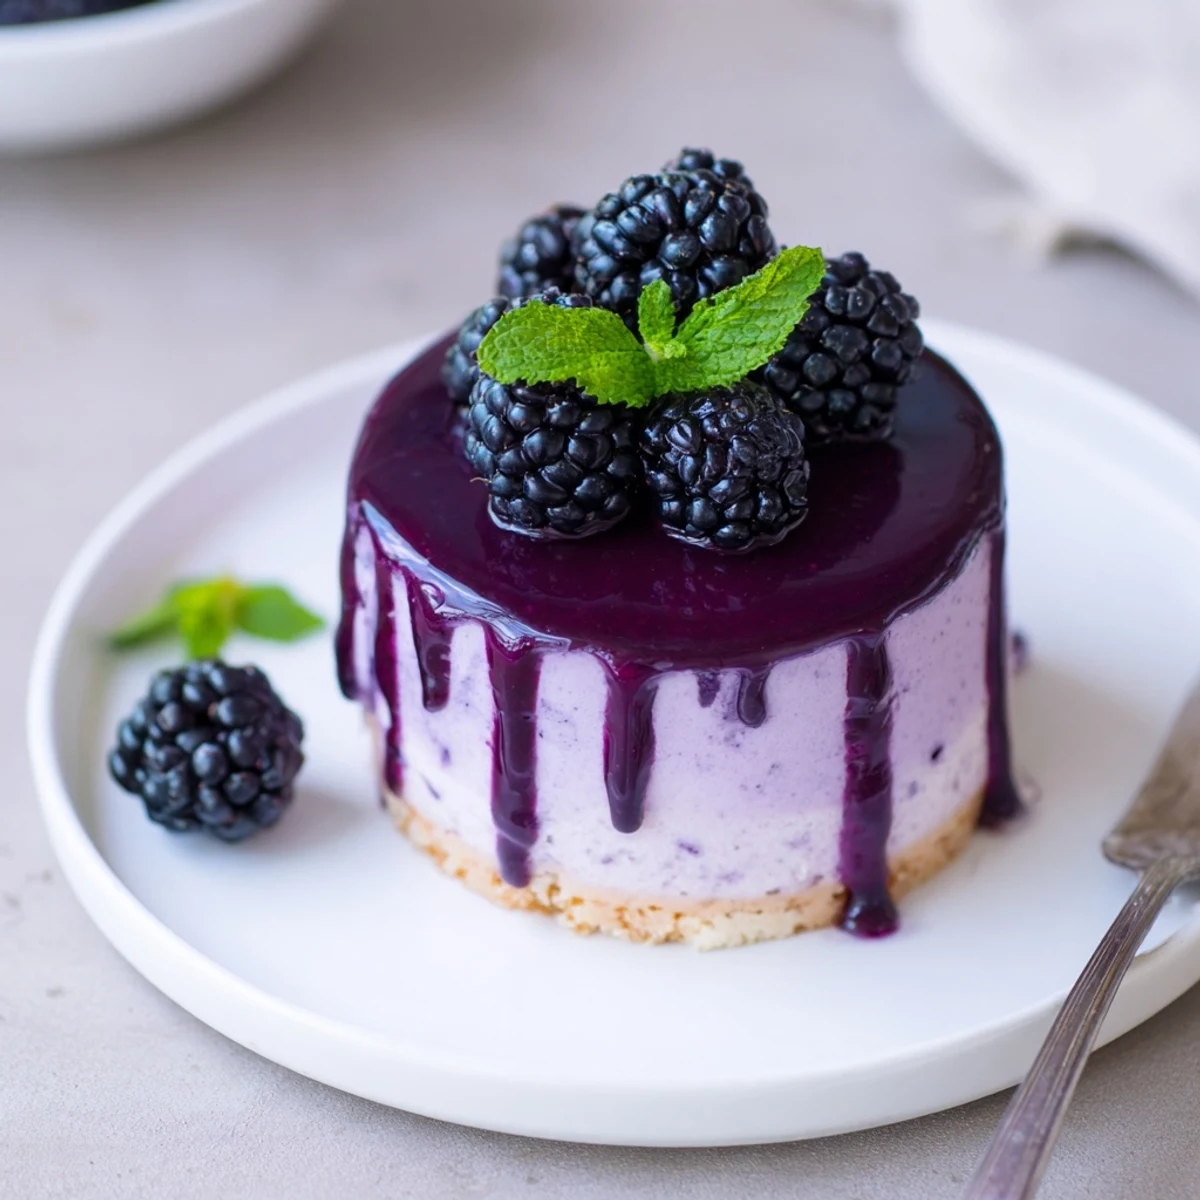
 These exquisite individual desserts combine a tender vanilla sponge base with an ethereal blackberry mousse, finished with a mirror-like glossy glaze. The fresh blackberry puree creates a vibrant purple hue while delivering intense berry flavor that balances perfectly with the light whipped cream. Each component builds texture contrast—the springy sponge provides structure, the silky mousse melts delicately on the palate, and the glistening glaze adds a professional patisserie finish. Though they require chilling time, the active preparation is straightforward, making these impressive mini cakes achievable for home entertainers.
Last summer I served these at a garden party and watched my normally reserved neighbor close her eyes after the first bite. The way the glossy purple glaze catches the light makes them look like little jewels on a plate. I made eighteen and somehow every single one disappeared before the sun went down.
I developed this recipe after failing three times at a larger blackberry mousse cake that kept collapsing. My daughter suggested making them in individual portions instead. The smaller format solved everything and now I keep silicone molds just for this recipe.
Ingredients
- 2 large eggs: Room temperature eggs whip up dramatically higher and create that signature sponge bounce
- 60 g granulated sugar: Precise sweetness keeps the sponge tender without becoming tough
- 60 g all-purpose flour: The structure needs to be delicate enough to support the mousse without becoming dense
- 1/4 tsp vanilla extract: Pure vanilla ties the mild sponge base to the bold blackberry flavor
- Pinch of salt: Even desserts need a tiny salt note to make flavors pop
- 300 g fresh or frozen blackberries: Frozen berries work beautifully here but thaw them completely first
- 80 g granulated sugar: Balances the natural tartness of blackberries without masking their bright flavor
- 2 tbsp lemon juice: Acid wakes up the berry flavor and cuts through the rich cream
- 6 g gelatin: Sheet gelatin gives the cleanest result but powder works perfectly
- 250 ml heavy cream: Cold cream is nonnegotiable for achieving those soft peaks that hold the mousse together
- 100 g blackberry puree: Strain it twice through fine mesh for that mirrorlike glaze finish
- 30 g granulated sugar: Just enough to create a pourable glaze that sets beautifully
- 2 g gelatin: A single sheet creates glaze with the perfect jellylike consistency
- Fresh blackberries and edible flowers: The garnish transforms these into something photo worthy
Instructions
- Bake the Foundation:
- Preheat your oven to 350F and line a 9x13 inch baking sheet with parchment. Beat the eggs and sugar until they turn pale and voluminous. Gently fold in the flour vanilla and salt then spread the batter thin. Bake for 10 to 12 minutes until the surface springs back when touched.
- Prepare Your Canvas:
- Let the sponge cool completely then use a 2.5 inch cutter to punch out eight perfect circles. Place each circle in the bottom of individual silicone molds or lined muffin cups. This base layer gives every spoonful something substantial to hold onto.
- Build the Blackberry Base:
- Soft gelatin needs a five minute cold bath before it can work its magic. Simmer blackberries sugar and lemon juice until the fruit collapses into softness. Press the mixture through a fine mesh sieve to catch every seed then stir in the gelatin while the puree is still warm.
- Create Cloudlike Mousse:
- Whip the cold heavy cream just until soft peaks form. The cream should still look slightly flowy not stiff. Gently fold the cooled blackberry mixture into the cream in three additions. Take your time to keep that airy texture intact.
- Assemble and Wait:
- Pipe or spoon the mousse over each sponge base and smooth the tops. They need at least four hours in the refrigerator to set completely. I always make these the day before serving because patience is the secret ingredient here.
- Add the Glassy Finish:
- Gently warm the blackberry puree and sugar just enough to dissolve. Stir in the gelatin until it disappears completely then let the glaze cool until it feels slightly thickened. Unmold the chilled cakes and pour the glaze over each one letting it cascade down the sides. Chill once more until set.
- The Final Touch:
- Top each mini cake with fresh blackberries and maybe a tiny mint leaf or edible flower if you are feeling fancy. Serve them straight from the refrigerator and watch how quickly people reach for seconds.
 Save to Pinterest
 My friend asked for the recipe after trying these at her birthday dinner. I had to laugh when she called them restaurant quality because the technique is actually quite forgiving once you understand the timing.
Making Them Ahead
The mousse cakes actually improve after a night in the refrigerator. The flavors meld together and the texture becomes even creamier. I have kept them for two days though the sponge will gradually soften over time.
Berry Substitutions
Raspberries make the prettiest pink version while blueberries create a sophisticated indigo hue. Mixed berries work beautifully too though the final color will be less dramatic than pure blackberries.
Glazing Made Simple
Place a cooling rack over a baking sheet before glazing to catch the drips. Any leftover glaze can be refrigerated and gently reheated for a second coat if you want an extra thick mirror finish.
- Work quickly once the glaze reaches pouring temperature
- Tap the mold gently on the counter to release any trapped air bubbles
- Imperfections in the glaze disappear after the final chill
 Save to Pinterest
 These little cakes have become my go to for summer entertaining because they make people feel special without keeping me in the kitchen all day.
Recipe FAQs
- → Can I make these mousse cakes in advance?
-
Yes, these mini cakes actually benefit from being made ahead. The mousse needs at least 4 hours to set properly, and the flavors develop beautifully overnight. You can prepare them up to 2 days before serving, storing them covered in the refrigerator. Add the glaze and garnish just before serving for the freshest appearance.
- → What other berries can I use instead of blackberries?
-
Raspberries work excellently and create a stunning red-pink hue. Blueberries produce a darker, more subtle purple color and milder flavor. Mixed berries combine different notes for complexity. Simply adjust the sugar slightly—tart berries like raspberries may need an extra tablespoon, while sweeter berries might need less.
- → Can I make these gluten-free?
-
Absolutely. Replace the all-purpose flour with a 1:1 gluten-free flour blend containing xanthan gum for the sponge base. The texture remains virtually identical. Ensure your gelatin is certified gluten-free as well, though most unflavored gelatin naturally is. The rest of the components—berries, cream, sugar—are naturally gluten-free.
- → What type of molds work best for these individual cakes?
-
Silicone molds release most easily without damaging the delicate mousse. Look for 6cm diameter rounds, about 4cm deep. If using muffin tins, line them with plastic wrap extending over the edges, then lift out using the overhang as handles. Ring molds placed on a lined baking sheet work well too—simply lift the rings away after chilling.
- → Why did my mousse not set properly?
-
Several factors affect setting: ensure your gelatin was properly bloomed before dissolving in warm puree. Don't let the blackberry mixture get too hot—excessive heat can break down gelatin's structure. Also, fold the whipped cream in gently; over-mixing can deflate air pockets crucial for structure. Finally, confirm your chilling time—these need a full 4 hours minimum, preferably overnight.
- → Can I freeze these mousse cakes?
-
Yes, they freeze beautifully for up to 1 month. Place unmolded, unglazed cakes on a tray, freeze until solid, then wrap individually in plastic and transfer to freezer bags. Thaw overnight in the refrigerator before glazing and serving. The texture remains remarkably similar to freshly made versions.
