 Save to Pinterest
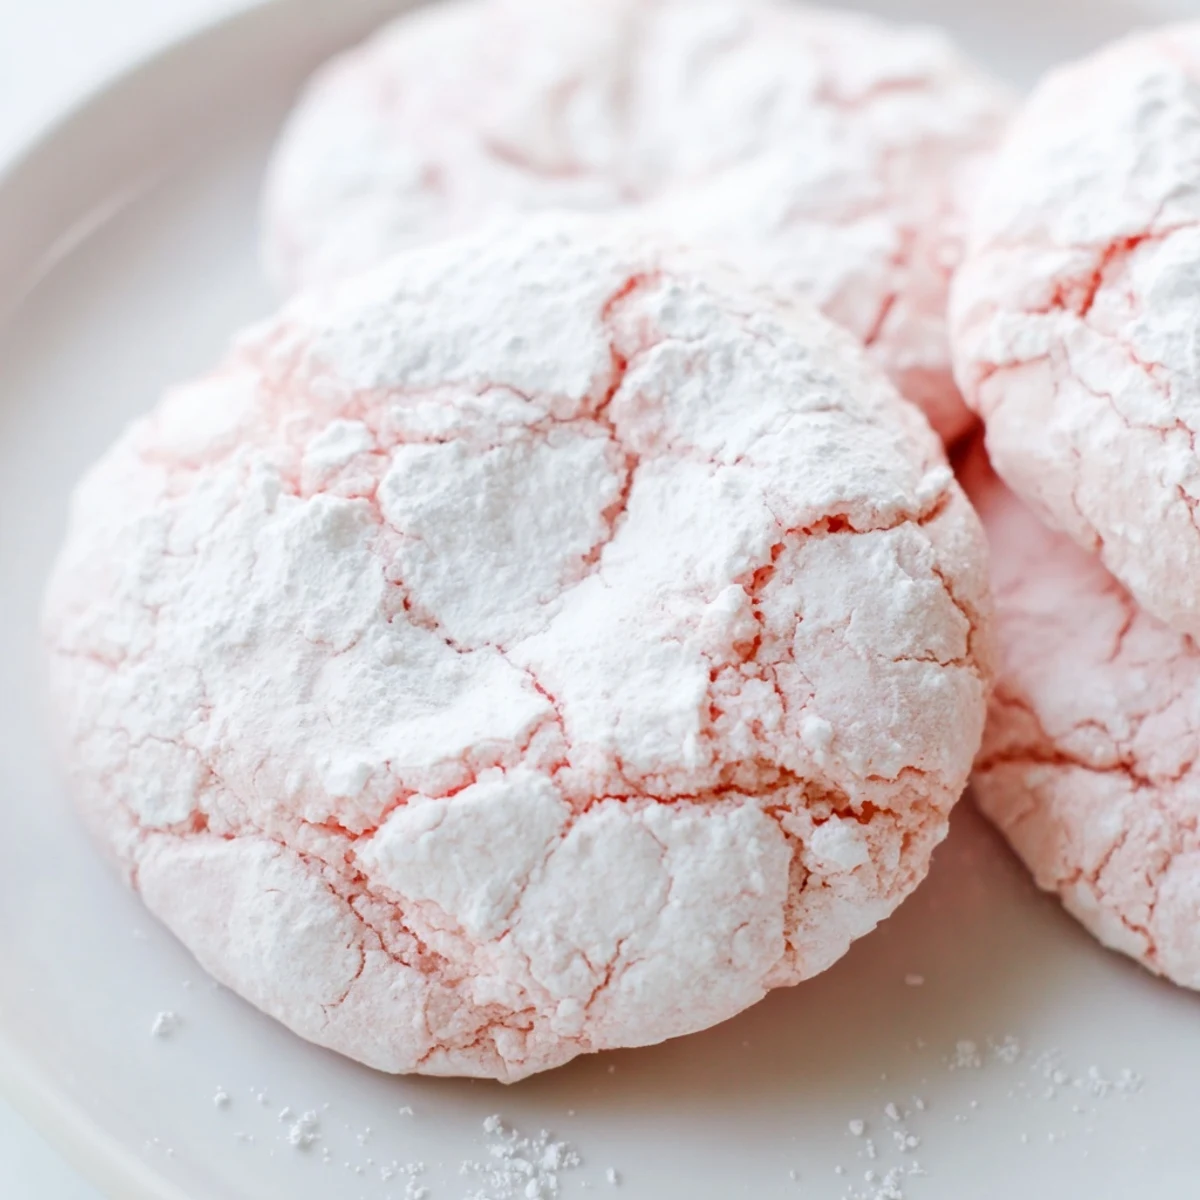
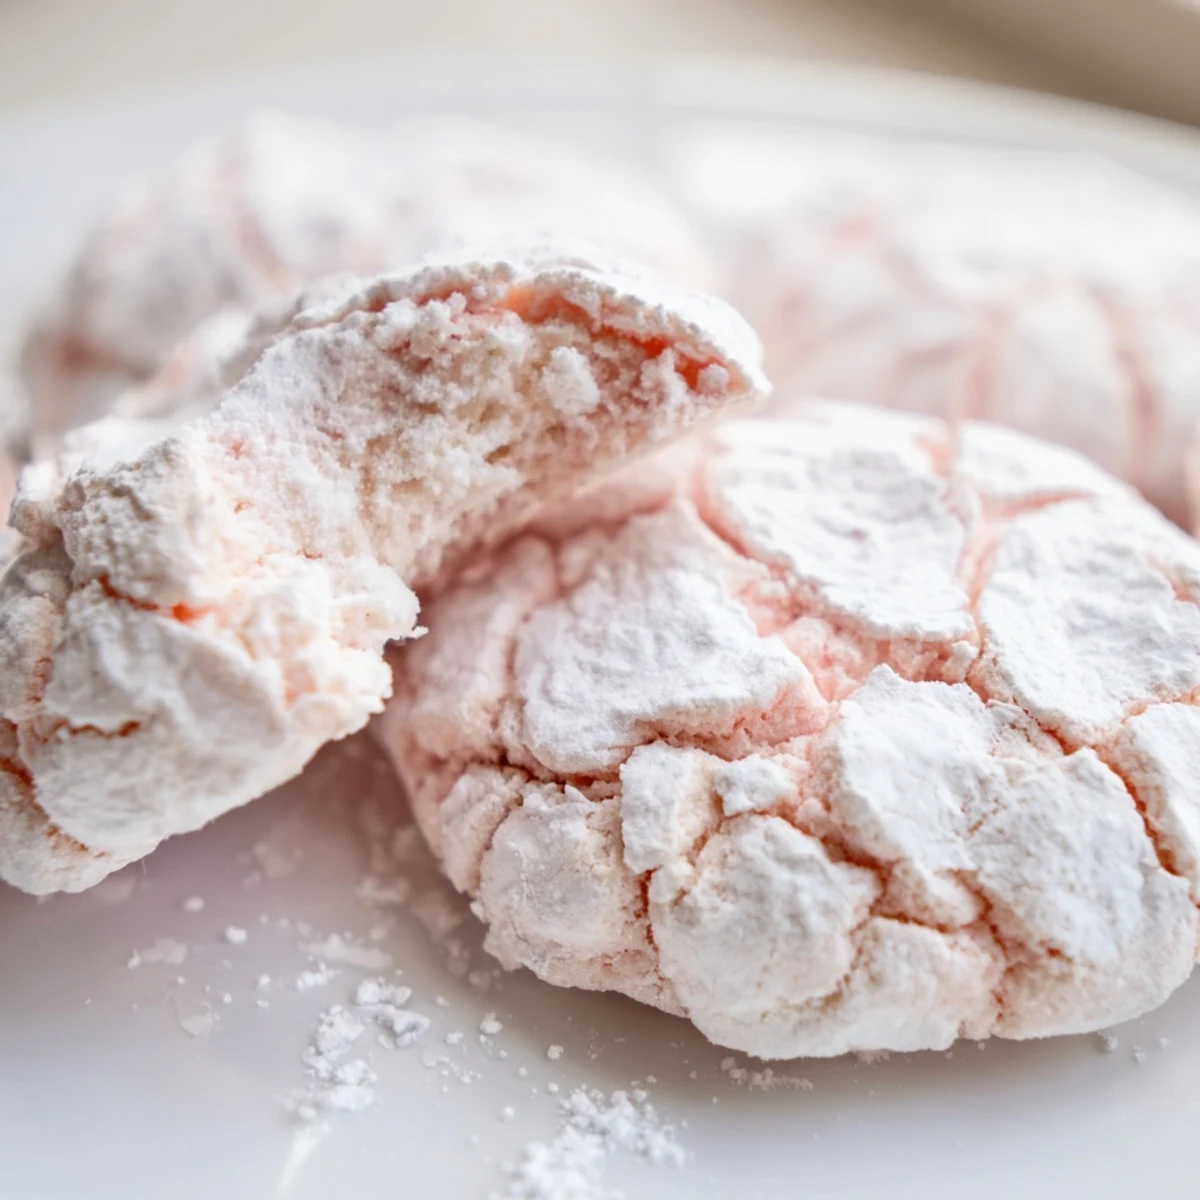
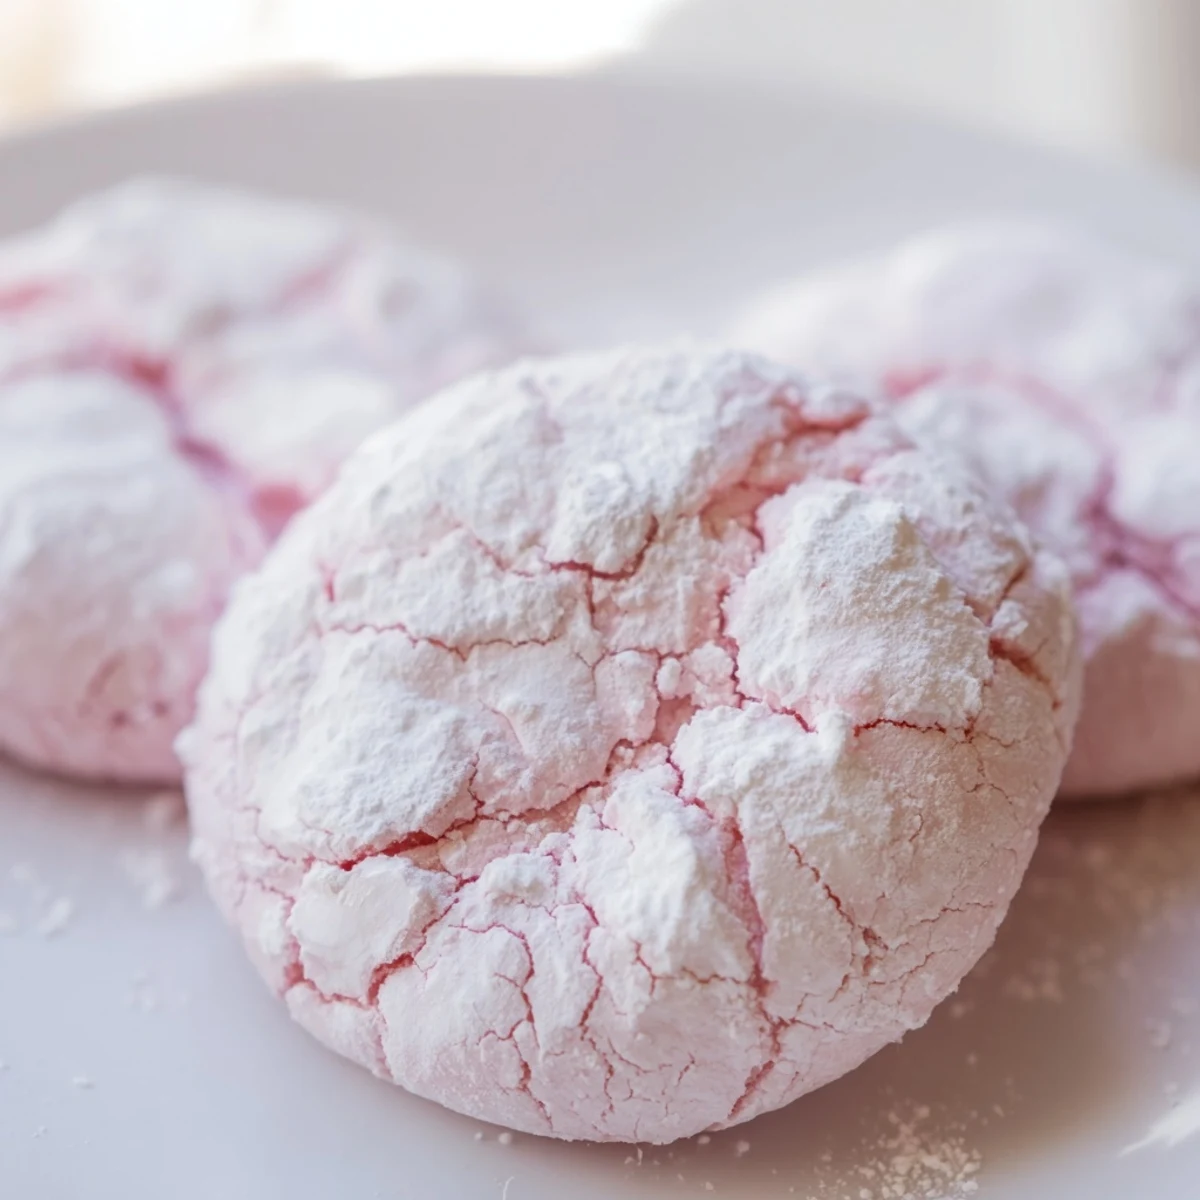
 Create bakery-worthy pastel crinkle cookies with a soft, chewy center and signature crackled exterior. These colorful treats feature delicate pink, yellow, green, and blue hues, each coated in a snowy layer of powdered sugar that creates beautiful crinkles during baking. The vanilla-scented dough comes together quickly with basic pantry staples, while gel food coloring delivers those dreamy pastel shades perfect for Easter, baby showers, bridal showers, or birthday celebrations.
Rolling the dough balls in powdered sugar before baking creates the characteristic crinkled appearance as the cookies spread and the sugar cracks apart. The result is a tender, cake-like texture with slightly crisp edges and meltingly soft centers. These colorful beauties store beautifully for up to five days, making them ideal for prepare-ahead treats or edible gifts.
The first time I made these pastel crinkle cookies, I was actually avoiding a massive spring cleaning project. Something about getting my hands covered in pastel dough and powdered sugar felt infinitely more appealing than organizing the garage. When they came out of the oven with those gorgeous cracks revealing the soft colors underneath, I completely forgot about the boxes I was supposed to sort through. Now they are my official procrastination baking go-to.
I brought a batch to my daughters kindergarten class right before spring break, and you would have thought I brought gold coins. The teacher texted me later asking for the recipe because apparently several kids refused to eat their lunch until they had their cookie. Something about those gentle pastel colors makes everything feel more hopeful and cheerful, even on a rainy Tuesday afternoon.
Ingredients
- All-purpose flour: The foundation that gives these cookies their structure while still staying tender
- Baking powder: This is what creates those beautiful cracks as the cookies rise in the oven
- Salt: Just a pinch balances all that sugar and makes the flavors pop
- Unsalted butter: Softened to room temperature so it creams perfectly into the sugar for that fluffy texture
- Granulated sugar: Sweetens the dough and helps create that irresistible chewy center
- Large eggs: Bind everything together and add richness to the cookie
- Vanilla extract: Pure vanilla adds that comforting, familiar background flavor
- Whole milk: Adds just enough moisture to keep the cookies from becoming dry or crumbly
- Gel food coloring: Gel coloring gives you those soft, dreamy pastels without adding extra liquid to the dough
- Powdered sugar: This creates the snowy white coating that makes the pastel cracks really stand out
Instructions
- Get your oven ready:
- Preheat to 350°F and line two baking sheets with parchment paper so nothing sticks
- Mix the dry ingredients:
- Whisk together flour, baking powder, and salt in a medium bowl until well combined
- Cream the butter and sugar:
- Beat them together until the mixture is light, fluffy, and pale yellow
- Add the eggs and vanilla:
- Beat in eggs one at a time, then stir in the vanilla until everything is smooth
- Combine everything:
- Add the flour mixture in two parts, alternating with milk, and mix until just combined
- Color the dough:
- Divide the dough into bowls and gently fold in gel coloring until you reach soft pastel shades
- Chill if needed:
- If the dough feels too sticky or warm, let it chill in the refrigerator for about twenty minutes
- Roll in sugar:
- Scoop tablespoon sized balls, coat them generously in powdered sugar, and place two inches apart on the baking sheets
- Bake to perfection:
- Bake for ten to twelve minutes until the edges look set but the centers still feel soft and slightly underbaked
- Cool completely:
- Let them rest on the baking sheet for five minutes before moving to a wire rack to finish cooling
 Save to Pinterest
 Last spring, my neighbor was going through a tough time and I dropped off a little box of these cookies on her porch. She sent me the sweetest text saying they made her cry happy tears, and sometimes I think food is just love in its most practical form. Now whenever I see pastel colors, I think of kindness and how something small can make someone feel seen.
Getting The Colors Right
Start with just a tiny drop of gel coloring because you can always add more, but you cannot take it back. I usually aim for colors that remind me of Easter eggs or sunrise skies, nothing too bold or jarring. The beauty is in the subtlety, so trust that the colors will deepen slightly as the cookies bake.
Making Them Ahead
The dough actually freezes beautifully if you want to get a head start on holiday baking or surprise gifts. Just scoop the balls, roll them in powdered sugar, and freeze them on a baking sheet before transferring to a bag. When you are ready to bake, add an extra minute or two to the baking time and nobody will know the difference.
Serving Suggestions
These cookies are absolute showstoppers on a dessert table, especially when you arrange them by color in a gentle gradient. They also make thoughtful gifts tucked into clear bags tied with pastel ribbon, and the powdered sugar coating gives them such an elegant finish. I have found that people cannot help but smile when they see a platter of these, no matter the occasion.
- Pair with herbal tea or lemonade for the perfect afternoon treat
- Stack them in a glass jar on the counter for instant cheer
- Package individually for party favors or classroom treats
 Save to Pinterest
 There is something magical about watching plain dough transform into these jeweled little cookies with their snowy white coats. Hope they bring as much joy to your kitchen as they have to mine.
Recipe FAQs
- → Why do my cookies lose their crinkles?
-
If your cookies don't develop crinkles, the dough may have been too warm when baked. Chilling the colored dough portions for 20 minutes before rolling helps maintain the crackled pattern. Additionally, ensure you're coating each ball generously with powdered sugar—the contrast between the sugar and dough creates those signature cracks during baking.
- → Can I use liquid food coloring instead of gel?
-
Liquid food coloring will work but may alter the dough consistency, potentially making it too sticky. Gel coloring provides concentrated pigment without adding excess moisture. If using liquid, start with just a few drops and add a bit more flour if the dough becomes too soft to handle.
- → How do I achieve true pastel colors?
-
Start with a tiny amount of gel coloring—less than you think you need. Mix thoroughly, then add more drop by drop until you reach the desired pastel shade. Remember that colors will deepen slightly during baking. Pink, yellow, green, and blue create a beautiful spring palette, but feel free to customize with any soft shades you prefer.
- → Can I make the dough ahead of time?
-
Absolutely! The colored dough can be wrapped tightly and refrigerated for up to 48 hours before baking. Let it soften slightly at room temperature for 10-15 minutes before rolling into balls and coating with sugar. You can also freeze the dough portions for up to 3 months—thaw overnight in the refrigerator before proceeding with the recipe.
- → Why are my cookies flat instead of puffy?
-
Flat cookies usually result from softened butter becoming too warm or overmixing the dough after adding the flour. Keep your butter at cool room temperature and mix only until just combined when incorporating the dry ingredients. Properly measured flour and accurate oven temperature also ensure the cookies puff and crackle beautifully.
- → Can I double this batch?
-
Yes, this recipe doubles easily without any adjustments needed. You'll get approximately 48 cookies instead of 24. Consider using separate bowls for each color when scaling up, or mix colors in batches to avoid overcrowding your mixing vessels. Storage time remains the same, making these ideal for large gatherings.
